
Master RGB LED color control using Arduino! Learn how to wire a common cathode RGB LED, program color mixing via PWM, and build vibrant LED effects. Ideal for beginners and hobbyists.
Introduction
🎨 What is an RGB LED?
An RGB LED is a light-emitting diode that combines Red, Green, and Blue LEDs into a single package. By varying the intensity of each color using Pulse Width Modulation (PWM), you can generate a full spectrum of colors.
There are two types of RGB LEDs:
- Common Cathode (CC) – All cathodes are connected to GND (used in this project)
- Common Anode (CA) – All anodes are connected to VCC
🔍 What This Project Does
This project teaches you how to control the color output of an RGB LED using an Arduino. You’ll:
- Connect an RGB LED to the Arduino UNO
- Generate colors using PWM outputs
- Display static or cycling color patterns
🌍 Real-World Applications
- Mood lighting systems
- Smart home lighting
- Indicator LEDs in embedded systems
- DIY light shows
📘 Skill Level
Beginner – Requires basic knowledge of Arduino and digital pins
🎯 Expected Outcome
- Understand how RGB LEDs work
- Wire and control color with Arduino
- Gain hands-on experience with PWM control
Components Required
| Quantity | Component | Description | Buy Link |
|---|---|---|---|
| 1 | Arduino UNO R3 with cable | Main microcontroller board | Buy on Elecsynergy |
| 1 | RGB LED (CA type) | Common cathode RGB LED | Buy on Elecsynergy |
| 3 | 220 Ohm Resistors | To limit current to R, G, B pins | Buy on Elecsynergy |
| 1 | Breadboard | For easy prototyping | Buy on Elecsynergy |
| 10+ | Jumper wires | To make connections | Buy on Elecsynergy |
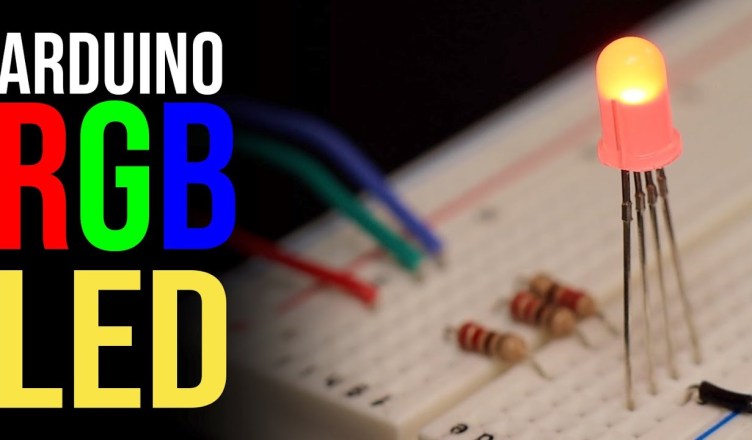
Circuit Diagram + Explanation
RGB LED Pinout (Common Cathode Type):
- Longest pin → GND
- Remaining pins: R, G, B (identify via trial or datasheet)
Arduino Pin Mapping:
| RGB LED Pin | Color | Arduino Pin |
|---|---|---|
| Red | R | D9 |
| Green | G | D10 |
| Blue | B | D11 |
| Cathode | GND | GND |
Circuit Description:
- Each R, G, B pin is connected through a 220Ω resistor to Arduino PWM pins
- Common cathode (GND) goes to Arduino GND
- Varying the PWM signal changes LED brightness per color, creating mixed hues

Arduino Code – Commented Line-by-Line
// Define RGB pin connections
int redPin = 9;
int greenPin = 10;
int bluePin = 11;

void setup() {
  // Set RGB pins as output
  pinMode(redPin, OUTPUT);
  pinMode(greenPin, OUTPUT);
  pinMode(bluePin, OUTPUT);
}

void loop() {
  setColor(255, 0, 0); // Red
  delay(1000);
  setColor(0, 255, 0); // Green
  delay(1000);
  setColor(0, 0, 255); // Blue
  delay(1000);
  setColor(255, 255, 0); // Yellow
  delay(1000);
  setColor(80, 0, 80); // Purple
  delay(1000);
  setColor(0, 255, 255); // Cyan
  delay(1000);
}

// Function to set RGB color
void setColor(int red, int green, int blue) {
  analogWrite(redPin, red);
  analogWrite(greenPin, green);
  analogWrite(bluePin, blue);
}
Working Explanation
- The RGB LED receives PWM signals on each color channel
analogWrite()modulates voltage to simulate analog output- By mixing brightness of R, G, and B, different colors are formed
- The
loop()cycles through a sequence of colors with delays
Demo / Output Preview
LED cycles through Red → Green → Blue → Yellow → Purple → Cyan
Troubleshooting & Tips
- Colors not correct? → Try swapping RGB pins
- LED not glowing? → Check GND and resistor values
- Flickering? → Ensure good breadboard contacts
- Dim colors? → Lower resistor values (e.g., 150Ω)
Project Expansion Ideas
- Add 3 potentiometer to control RGB channels manually
- Use a push button to change color
- Add a Bluetooth module for wireless RGB control
- Combine multiple RGB LEDs for effects
Encourage users to experiment with fade transitions using for loops
Conclusion
Controlling an RGB LED with Arduino opens up colorful possibilities in DIY electronics. It’s a perfect starter project to understand PWM, color mixing, and LED interfacing.
💡 Recap:
- RGB LED = 3 LEDs in one
- PWM = control brightness per color
- Arduino +
analogWrite()= simple and powerful
This foundational project sets the stage for more advanced visual interfaces.
🛒 Buy the Complete Kit
👉 Get Everything from Elecsynergy


